PyMOL has the academic registration option, please notice, this is only for education or self-study purpose, any academic publication purpose is not allowed, even it is non-profit. If you are a Schrodinger client, you get PyMOL access as well.
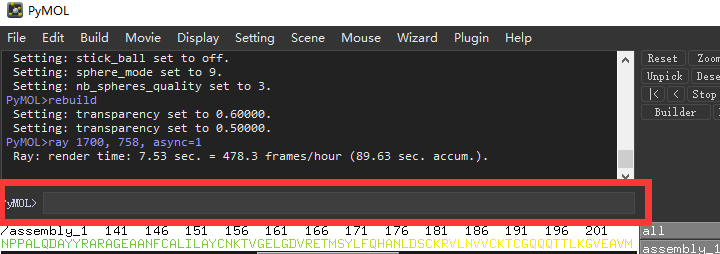
The bar highlighted in red is the most important thing you want to know, all the commands are inputted here, by saying “commands” I mean a mix of basic “ bash” and unique PyMOL specific commands.
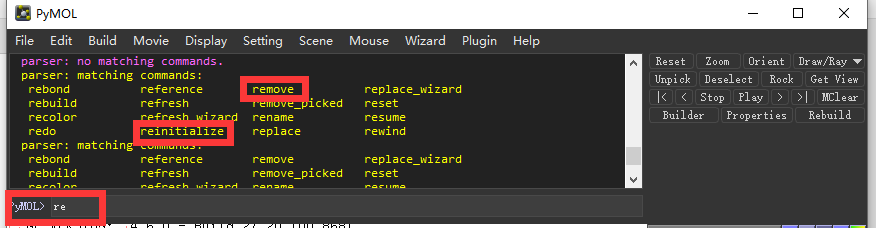
Don’t worry, the TAB button is always your friend, if you type “re” and then the tab will list all the commands begins with re, like “remove” or “reinitialize”.
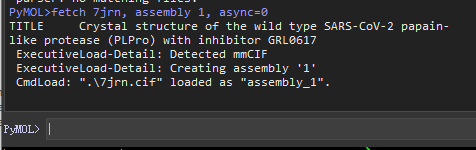
Let’s use the Crystal structure of the wild type SARS-CoV-2 papain-like protease (PLPro) with inhibitor GRL0617 as an example,
But here we just go to the "File" > "Get PDB" and a new window prompt asking you input the PDB ID, fill 7JRN, then click "Download". Alternatively you can type "fetch 7JRN" into the command line box, press Enter. Or, you can download the structure from 7JRN to your local computer then drag it into the PyMOL window.Get familiar with the command line.
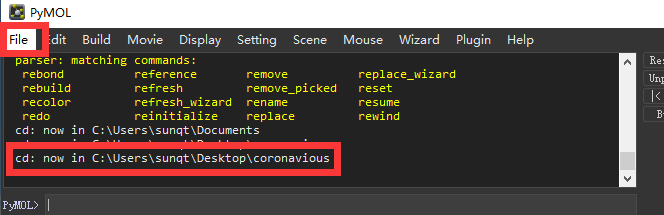
The good thing is every time you click somewhere on the toolbar like you click the “File” > “Change Work directory” > to "Your-directory" named "coronavirus", the command "cd C:\Users\Your-derectory\coronavirus\" refresh in time with your action, so next time if you just type the corresponding command instead of clicking, PyMOL will do the same action, it is a good learning process for those who are not familiar with PyMOL commands
 Lets type "fetch 7jrn" command, press enter, the protein shows up but as a dimer with two repeated units. Running with a dimer will slow down the speed of later image making process, and it is meaningless to do so, since they are almost the same to each other.
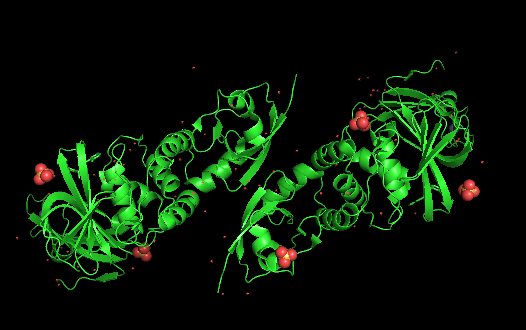
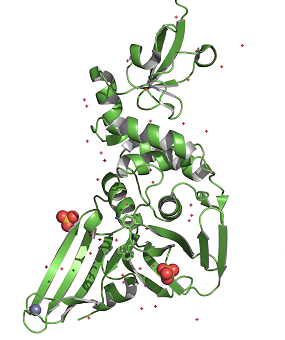
There are two chains as above, to obtain a single chain, we just type "remove chain A" or "remove chain B", and press enter. You should now only have one chain left. Alternatively, you could type the following from the very beginning:
            set assembly, 1
            fetch 7jrn, assembly 1, async=0
By doing this, you also get a single chain.
It looks not very nice by now, next we will put the commands one by one to make it better and better. First is a cheat script applies to all proteins, the following commands are originally from from Getting High Quality Pictures in PyMOL with slight modification
               set bg_rgb=[1,1,1]
               pace cmyk
               set orthoscopic, on
               set ray_trace_fog=0
               set depth_cue=0<
               util.performance(0)
               util.performance(0)
               set cartoon_highlight_color, grey75
               set antialias, 4
               set hash_max, 300
               set internal_gui=0
               set ray_trace_mode, 1
               set ray_trace_gain, 0.005
               set ray_trace_color, magenta
               set ray_shadows,1
               ray 2400, 2400# or 1024, 768
               png ~/Desktop/coronavirous.png, width=10cm, dpi=1000, ray=1
(You can copy all the above lines, paste them in a txt file, and save the file as *.py, then go "file" > "run script" > choose the *py, click run, so all the commands run at one time)
Now it looks better, but if you only interest in the ligand binding to this protein, this image don't tell you much. Next let's do something to highlight the ligand
type "set seq_view,1" press enter, the amino acids sequence with all the co-factors appears on the top of the image. If you click on the ligand in red box, the ligand name in the sequence will be highlighted, vice versa.
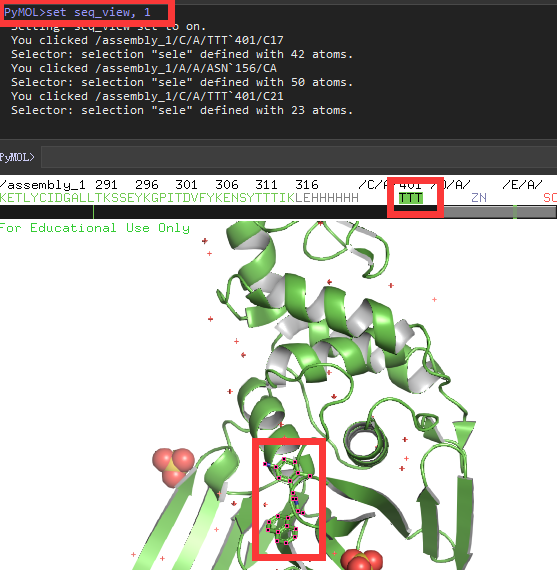
Select all the co-factors in the sequence but the ligand TTT with shift, and type "remove sele" , press enter, only protein and ligand left.
Get familiar with the clicking.
1. click the color button for All, select "cyan"
2. select the ligand, click color button for" blue"
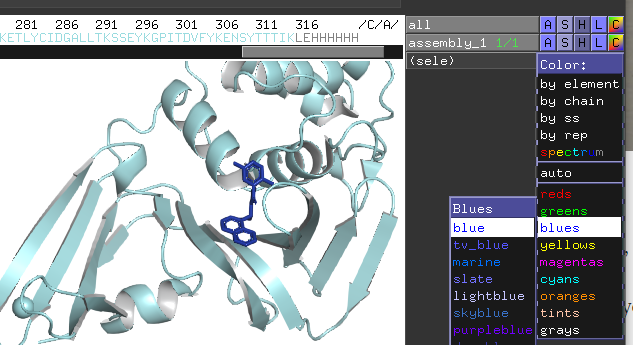
3. click "S" > show "surface" for assembly_1
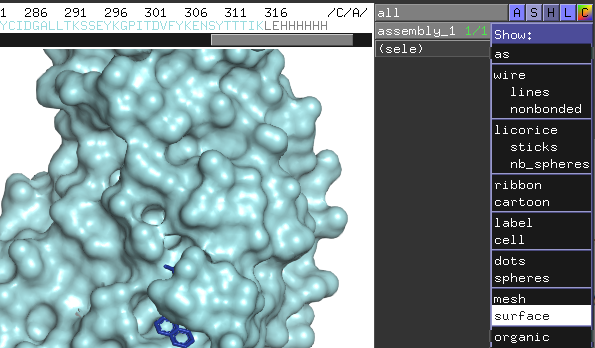
4. Click "Display" > "quality" > reseanable quality
5. "Setting" > Transparency > surface > 50%
If you only require a general sense of a small molecule bound to a protein, you may just save your image as per step7, but if you want more details about the binding site, go ahead with step 6.6. Click the A for assembly_1, then click "present" > lignad site> cartoon
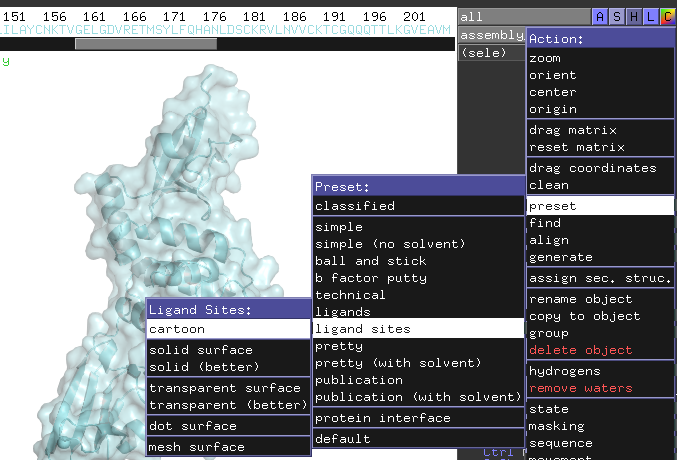
>
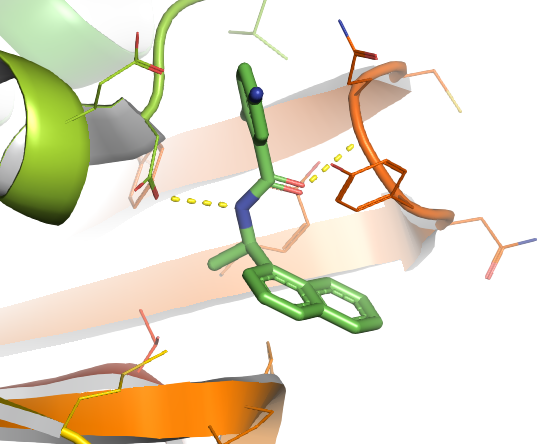
If we rotate a bit, there are two H-bonds formed between TTT and the coronavirous here as shown in yellow dashed lines.
7. Click the upright "Draw/Ray" > "Ray", and wait until the imagge show up
Save image file to your folder
Further reading
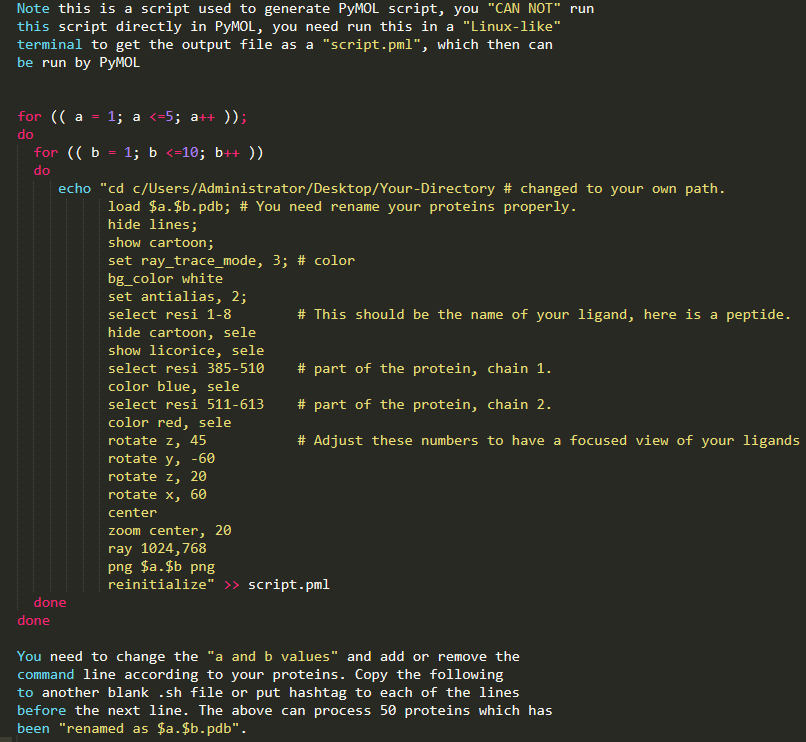
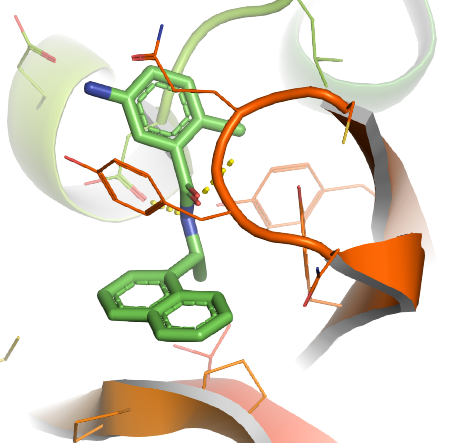
You properly noticed, the above image is still not perfect, but due to the limitation of this blog, I don't want to go further to overwhelm people, but starting from the last image, there are a lot of new commands we could apply, especially put more emphasis on the interaction between the small molecule and protein. An example picture attached here for those who want further leaning (The example) below is no longer based on the coronavirus protein, YOU NEED TO CHANGE IT BASED ON YOUR PROTEIN.
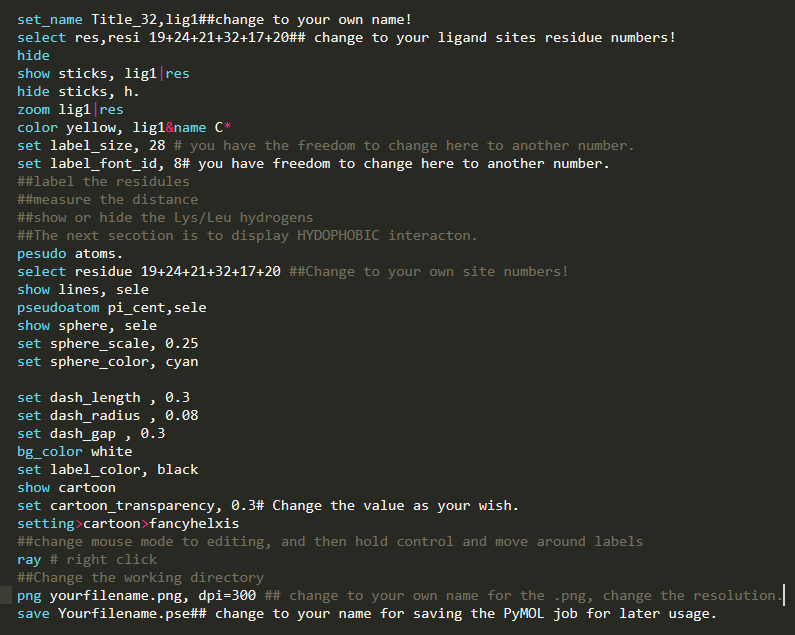
Also, I provide here a pymol.sh script which can be used to write repeated PyMOL scripts .pml, when multiple proteins need to be processed in a high through manner. What you need do is just modify the .sh file a bit, then run this .sh in any terminal, there will be output.pml file then run this .pml with PyMOL, multiple proteins will be processed at one time